HOW TO CREATE 3D PRINTED ARCHITECTURAL SCALE MODELS
GETTING STARTED WITH 3D PRINTING ARCHITECTURAL SCALE MODELS
 This article outlines in depth all the nitty-gritty stuff you need to take into considerations before getting your feet wet with 3D Printing.
If you are new to 3DP you will get a good idea how much it cost, what does it take and where you can have your files made.
If you are an advanced 3D printing user, you will still find practical information on how to optimize files and test them before submitting to the printer.
Bottom line:
If you’d like to tap into the real potential of 3D Printing for Architectural model making, here is how.
Read on…
WHAT IS THE VALUE OF SCALE MODELS AND WHERE DOES 3D PRINTING COMES IN?
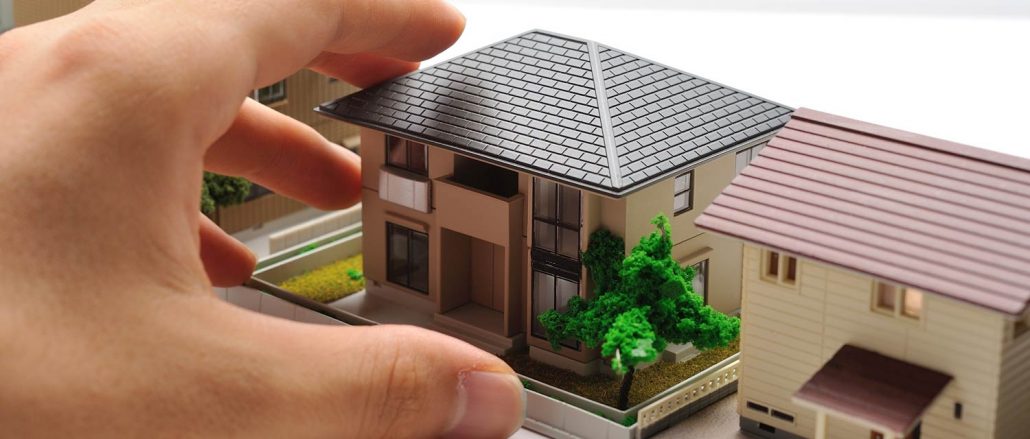
It’s not a secret anymore that 3D Printing technologies deliver numerous advantages to architects, builders, relaters and future homeowners. Starting from the initial design stages of a project all the way to the final blueprints and schematics, this tool can provide great visuals on time and budget. Scale models have always been part of the design process, but in recent years fewer firms are making them, even though most clients and investors would love to see a miniature of their future investment. And we understand, it’s time-consuming, it’s expensive and usually, only one copy is made when the design is close to being finalized. On the other hand, the 3D printing workflow reduces time and price, significantly. Another benefit is that it provides an almost entirely digital workflow, meaning that scale models can be modified and made efficiently at any time and any stage of a design in progress. There are only a few additional steps in converting already existing 3D files into 3D printable ones to obtain a highly detailed physical copy of any project. Instead, 3D renderings come into play. The truth is that photorealistic renderings and animations are not enough, it’s about visual vs. material. When it comes to designing a building from the ground up, home builders and architects often have a difficult time connecting and communicating with future homeowners and investors. Showing them the completed results in drawings and renderings alone is difficult. Physical 3D models provide immediate understanding even to the most non-technical personas. Now architects and builders have the opportunity to communicate faster, cheaper, and more efficiently with each other while leaving a long lasting impression on their clients.
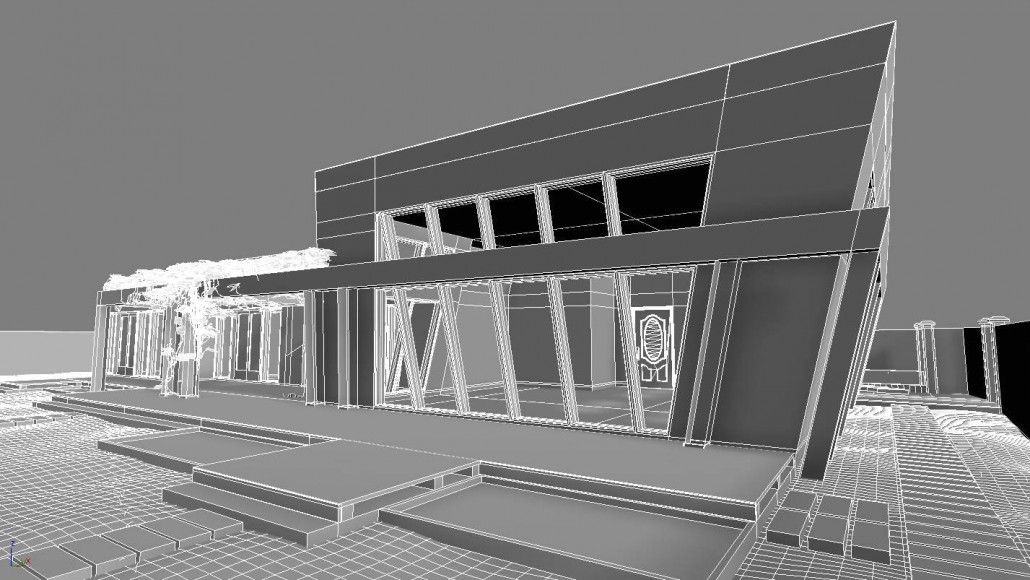
3D MODEL READY FOR PRINTING AND RENDERING
3D Printing is ushering the comeback of architectural scale models. Firms worldwide are making the switch to 3D printing. At the moment, the technology is described as high-tech, but make no mistake, there will be a point in the future where 3D printing will become the standard. Now architects and builders have the opportunity of making the switch, gaining instant recognition by bringing exceptional value and advantage to their businesses.

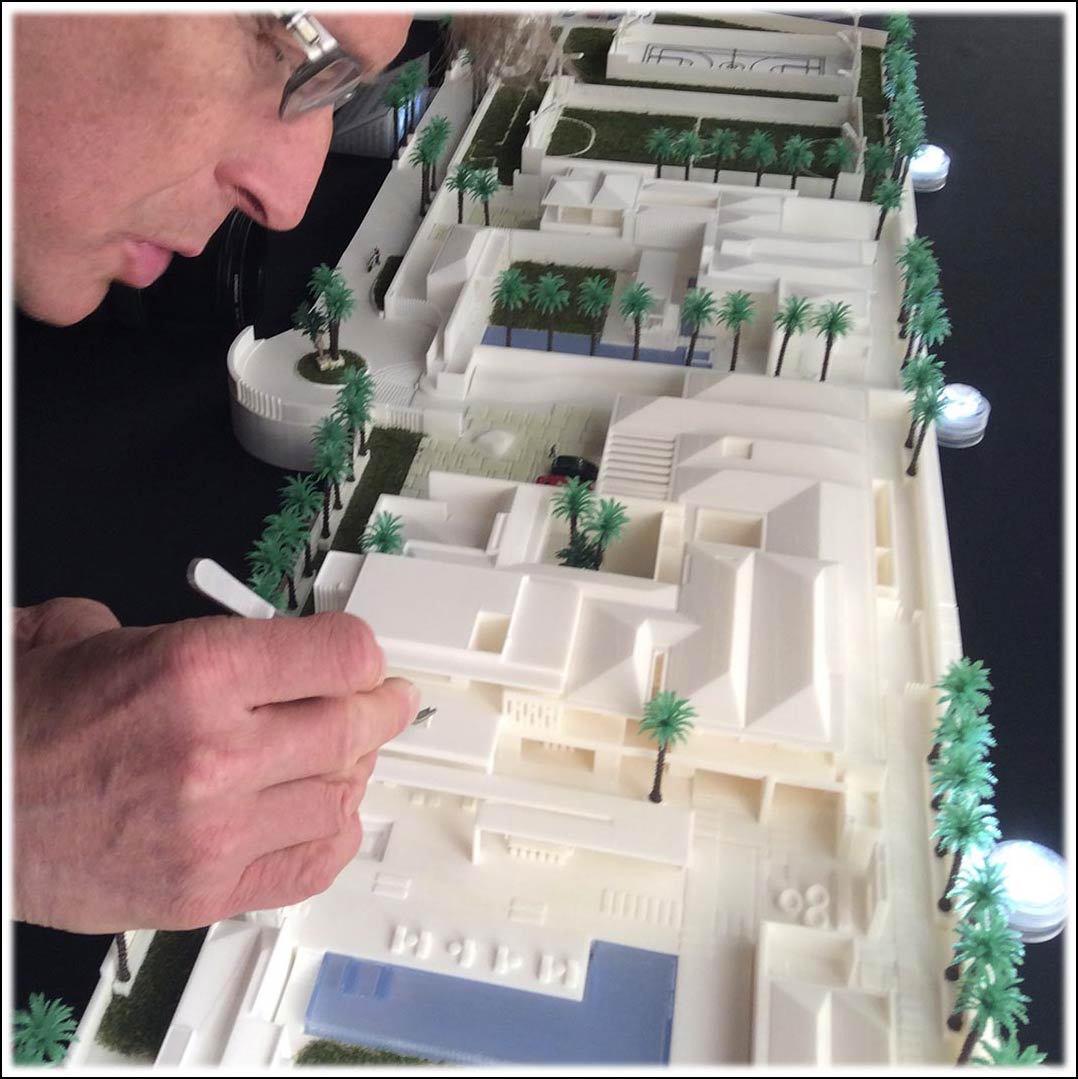
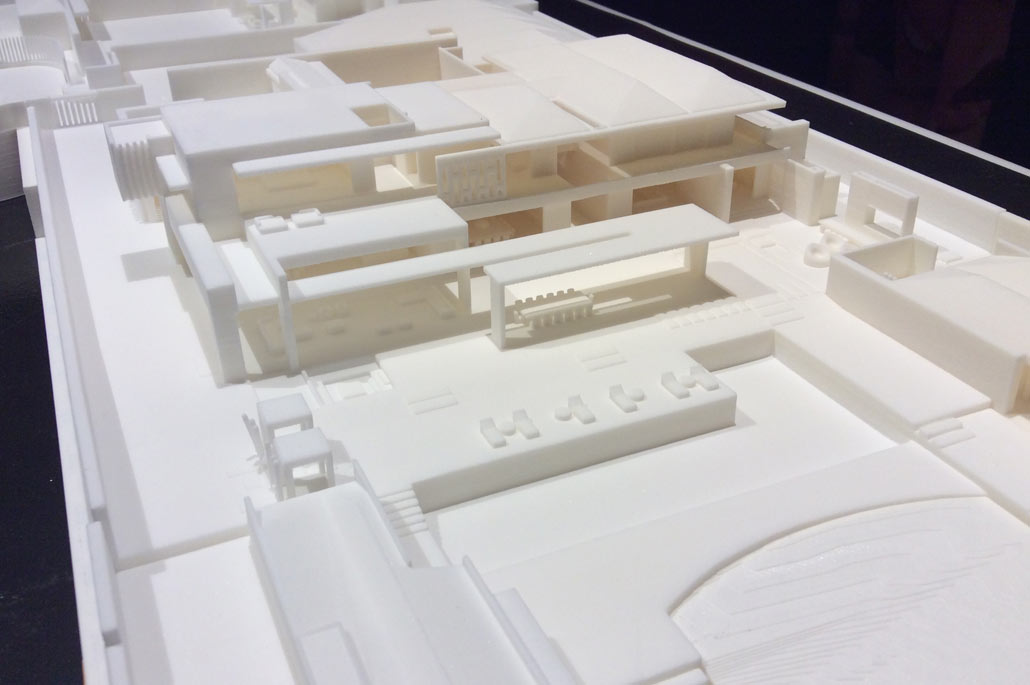
FINAL 3D PRINTED SCALE MODEL WITH DESKTOP FDM TECHNOLOGY
Let’s get back to the point.
WHAT IS THE WORK INVOLVED IN CREATING 3D PRINTED ARCHITECTURAL SCALE MODELS AND WHAT IS THE COST?
There are two significant aspects of determining how much a 3D Printed scale model will cost: design time and 3D printing material. We must first be able to calculate a project accurately before putting time, effort, or sending requests for a quote. To gain a deeper understanding, here are few things we have to become familiar with:
Getting Started with Design For 3D Printing
The price of the design process depends on the time invested in it. Whether you do it in your studio or hire an agency/freelancer to do it for you, time is money. The time designing is associated with the complexity of the model, the information included, and the level of detail we want to achieve for the proper scale. What most architects don’t realize is that since you already work in a 3D environment, you most likely have already done more than half of the design work. Designing for 3D printing is slightly different from just composing in 3D. A file created for 3D renderings or CNC, for example, will require additional modifications. The difference comes apparent, and we have to design for the real world, in consideration of the 3D printing technology and the material properties we are going to use.
DISCOVER THE MAGIC OF 3D PRINTING FOR ARCHITECTURAL PRESENTATIONS
It doesn’t matter which CAD or 3D Modeling software you are going to work with or are already working (Rhino3D, SketchUp, Revit, 3Ds Max, Maya, Chief Architect, ArchiCAD, etc.). Currently, any 3D software package is capable of creating and exporting 3D print ready files. STL, OBJ, and VRML files are among the most popular. In case you’d like to give it a try and design in the comfort of your studio, we recommend to stick with the tools you know best or the software you are already using for the project. The benefit of doing this is that you can always apply the same design techniques form the very beginning of every new project you start. Once you learn how to create successful 3D print-ready files, this will save you tons of time and money in the long run. Designing with 3D printing in mind form the start is vital. By doing this, you can obtain a physical replica, after every significant change, instantly without having to spend time converting the same design file into a 3D print one.
MAIN 3D PRINTING DESIGN GUIDELINES
SOLID, WATERTIGHT, MANIFOLD
The first and most important concept when designing for 3D printing is creating solid = watertight = manifold geometry. Watertight means that every edge of the model must have precisely two surfaces attached to it without any holes. Non-manifold geometry is essentially geometry that cannot exist in the real world. Models that are not solid by default might get misinterpreted by the slicing software, which will result in the object having inconstant layers, missing geometry, holes or not being printable at all.
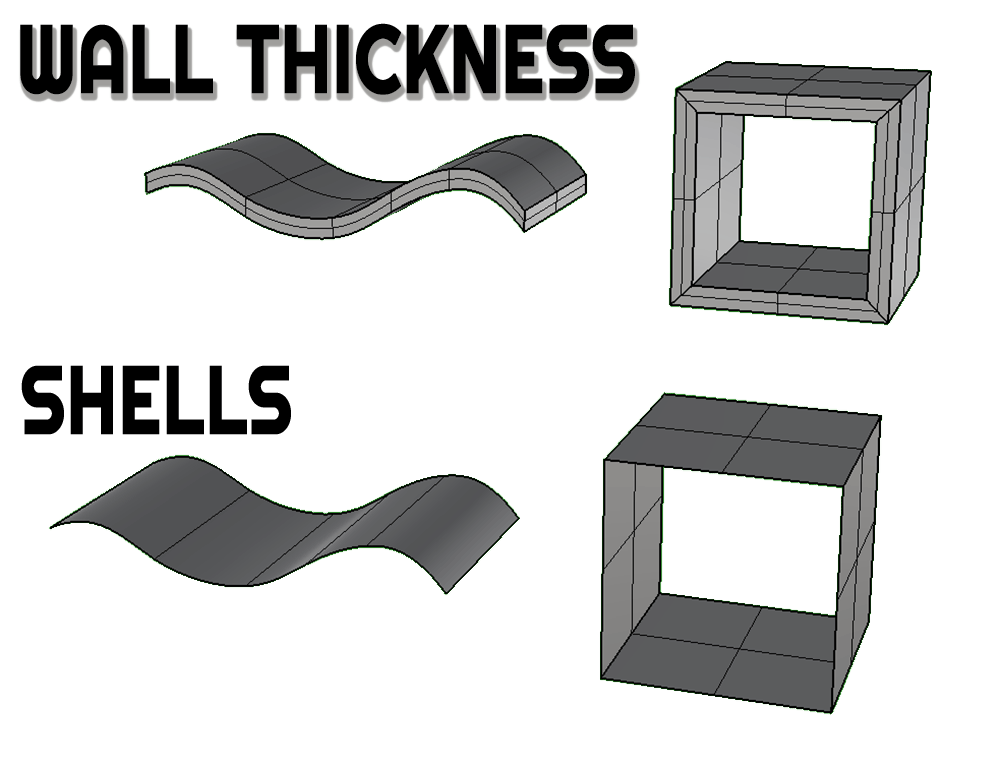
DIFFERENCE BETWEEN SOLIDS AND SHELLS
OUTWARD FACING SURFACE NORMALS (FACE NORMALS)
A normal is an invisible vector that is perpendicular to the surface. Make sure the directions of the normals are positioned outwards. Normals facing inwards (which is also referred as flipped normals), will create negative geometry that will be subtracted from the model or the printer won’t be able to read the geometry and will get confused. Almost any software has a tool that can show you the direction of the normals and command that lets you flip the ones you have to.

NORMALS FACING OUTWARDS
PROPER WALL THICKNESS
Always make sure that the walls of your model are thick enough to print. 3D printing technologies can achieve accurate features that are printable up to a point. Also, make sure that your design applies to the law of gravity such as features supporting too much weight. Make them relative to its thickness.
MINIMUM SIZE OF DETAIL FEATURE (EMBOSSED, ENGRAVED GEOMETRY AND HOLES)
The 3D printer precision mainly determines the minimum detail size. It is important to note that very fine features of the model can difficult to see or be lost during the cleaning process after the part was printed. A way to ensure the printability and visibility of a model is to exaggerate the smallest details slightly you’d like to have in the model.
A good practice is to analyze the model while designing it within your software of choice itself. Other alternatives are programs like Netfab, Meshmixer, and Magic, which can detect issues after the design is finished and repair the errors without altering the overall form of the model.
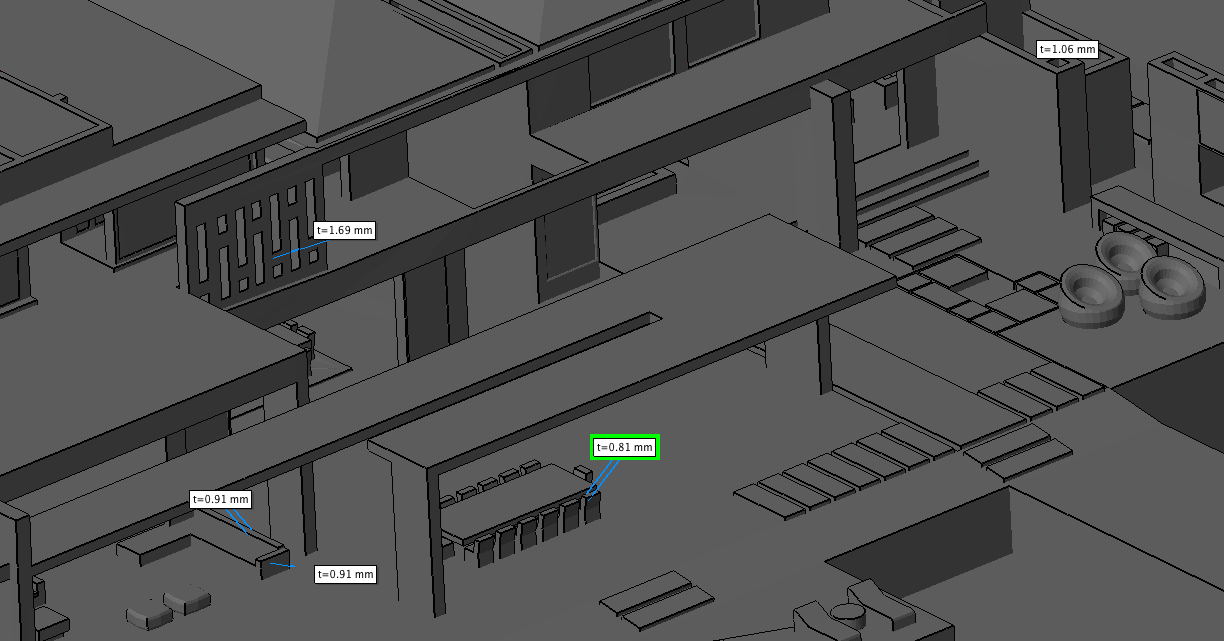
PROPER WALL THICKNESS AND MINIMUM SIZE OF DETAIL FEATURE
E-BOOK: HOW ARCHITECTS, BUILDERS, AND DEVELOPERS ARE BENEFITING FROM 3d PRINTING:
FURTHER OPTIMIZING THE FILES BEFORE PRINTING
Going an extra step and optimizing the model you are about to print is also an essential part of the process and should not be skipped! File optimization will save you money on 3D printing itself and will ensure that you get the exact result you are hoping for. This is where a pro-3D printing designer can show off his skills. For the beginners, there is nothing to worry about! Service bureaus like Shapeways and Sculpteo are packed with all the tools needed to make it happen in your browser once the models are uploaded.
Here are the optimization tips and tricks worth considering before starting a print:
HALLOWING THE 3D MODEL
Using less material while 3D printing will result in spending less money. Solid models consume a lot of material. Most 3D printing service providers charge per material volume (cubic centimeters) being printed. Simply hallowing a model, the price can drop dramatically from thousands of dollars to a few hundred.

HALLOED STL FILE OF AN ARCHITECTURAL SCALE MODEL
CREATING ESCAPE HOLES (WHERE APPLICABLE)
All powder technologies require escaping holes if hallowed internally so the unused powder material can be removed from inside the model and be reused. Before hallowing your model, make sure you get familiar with the design guidelines of the 3D printing technology you are planning to use.
STL FILE WITH ESCAPE HOLES
REMOVING UNNECESSARY GEOMETRY
This seems obvious, but it is worth mentioning. For scale models, any features that are not visible, functional or are too small are worth considering removing or not modeling to start with. This way you can continue to save some money on 3D modeling and 3D printing. Simplify the model as much as you can!
MINIMIZING THE NEED FOR SUPPORT STRUCTURES (WHERE APPLICABLE)
Concerning desktop 3D printing, overhangs are challenging to work with. An overhang is a section of the model where the next layer is not supported or is partially supported by the previous layer. In this case, we need support structures to ensure printability. Consider minimizing the supports or working your way around them in case you are using an FDM/FFF desktop 3D printer. If the supports are being printed with the same material as the part, the surface in contact won’t appear as good as the rest of it. Besides, they might be hard to remove, and if you are not careful, you can damage the printed model too, which adds to the overall time.
FILE SIZE, FACE COUNT, AND FILE RESOLUTION
As we said earlier, simplify the 3D model as much as you can! Regarding size, your final file when exported for 3D printing can’t be larger than 50MB or have more than 1,000,000 faces/polygons.
The file resolution refers to the number of polygons the models contains. More polygons equal smoother surface for curvatures and larger files. We all want prints to be as smooth as possible, but most machines cannot achieve a tolerance higher than 0.01 mm, and you won’t be able to tell any visible difference between 0.1 and 0.01 mm tolerance in most cases. Try to keep polygon count to a minimum, especially for more complex projects.
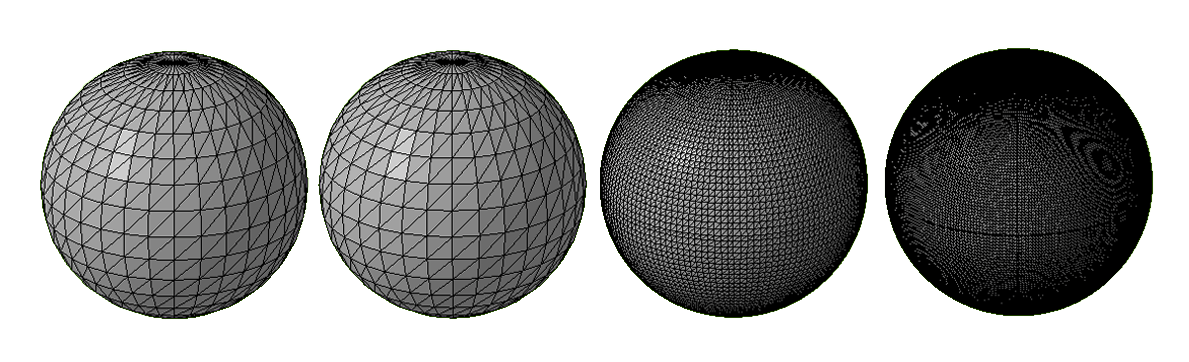
FILE RESOLUTION AND FACES COUNT
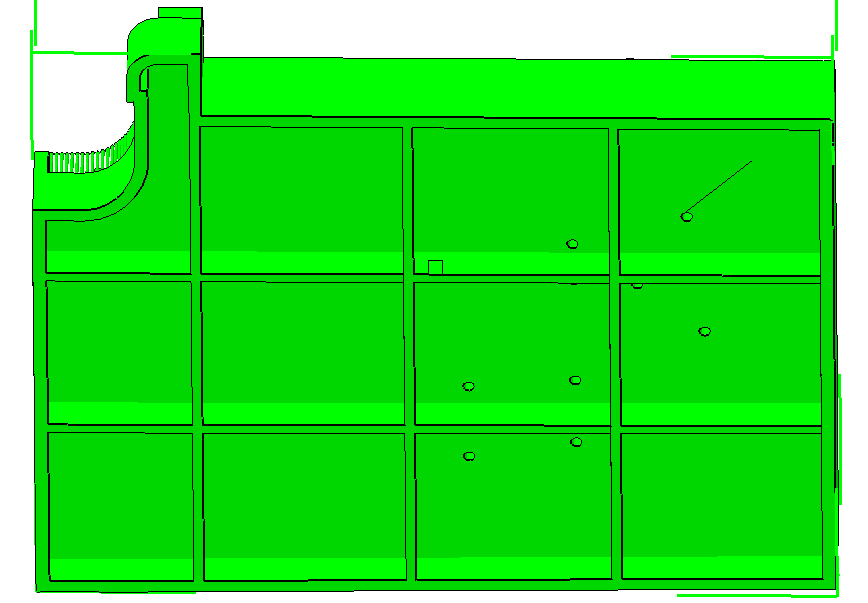
REPAIRING FILE ERRORS
You have now exported your architectural project to the proper file format following all the design guidelines in consideration to the 3D printing technology and material that will be used. But let’s be real, producing complex and completely error-free 3D printable files is not as easy as it sounds. Specialized software tools like Netfabb, Magics, Make It Printable, Meshmixer, MeshLab and others are here to solve this. Always run your final design through one of these programs. They will let know if there are any mistakes and where within your file. The best part is that with a few clicks you can fix most errors and have 3D print ready files.
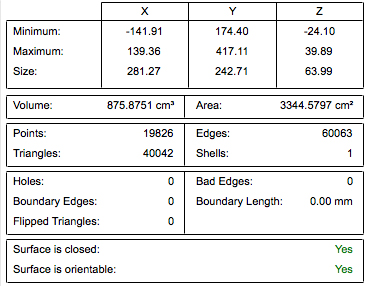
ANALYSIS OF PERFECT STL FILE
SIMULATING PRINTABILITY
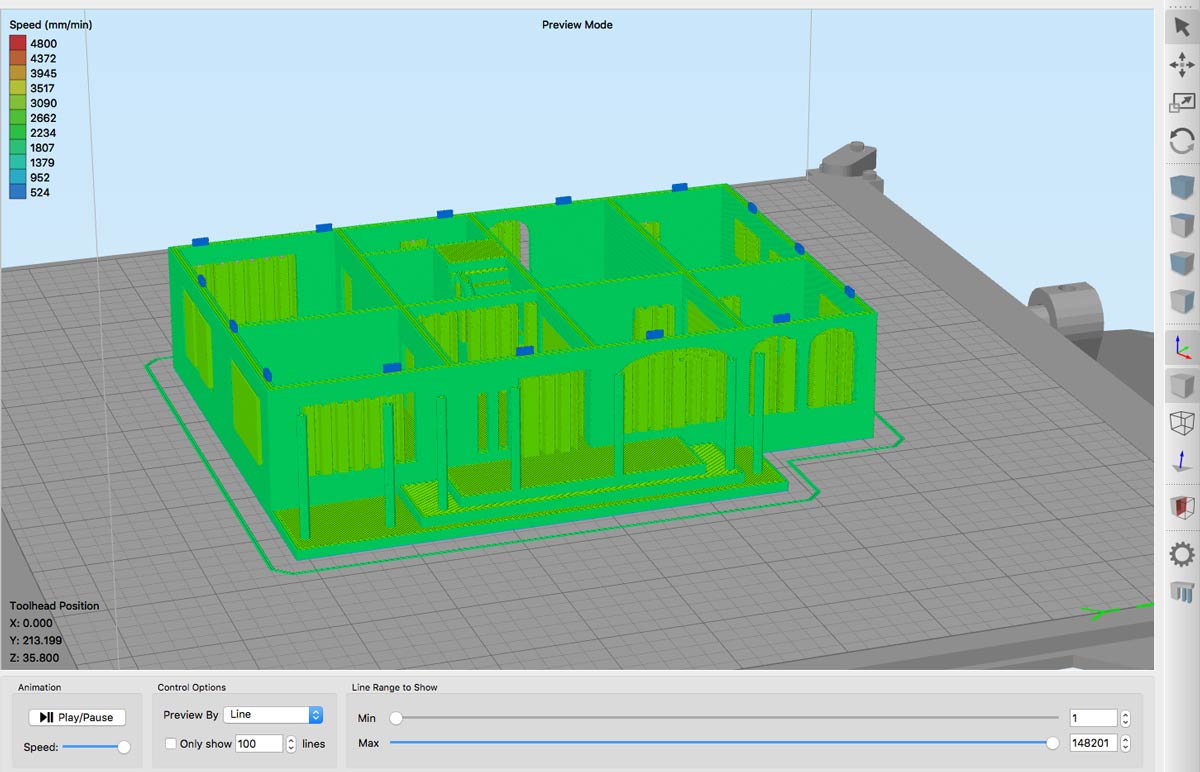
It’s always a good idea before submitting your files for 3D printing to double check them. You can do this with a slicing software like Cura or Simplify3D to quickly visualize the layers to spot any inconsistencies. No matter the 3D printing technology you are planning to use, you can set those programs with the same layer height, x-y resolution, etc., to get a pretty good idea of how the final printed part will look like in layers.
3D Printing
Now, you have to decide whether you want to print in-house or outsource:
IN-HOUSE 3D PRINTING
A good desktop 3D printer fitted for the purpose starts at around $1,500 to $4,000, more professional office friendly machines start at $20,000 to $80,000 with full-color capabilities or outstanding print resolution. If you are on the market, looking for a 3D printer keep in mind that one machine can’t do it all. Any technology has its cons and pros. Another consideration you have to make is, do you have time to operate and maintain the machine? Also, post-process, the parts coming out of it, like removing supports, cleaning powder material, etc., will add time to your schedule or money to your payroll. Before investing in an in-house solution ask yourself how many models you will be producing monthly/yearly. If you plan to put the machine to good use, then go for it.
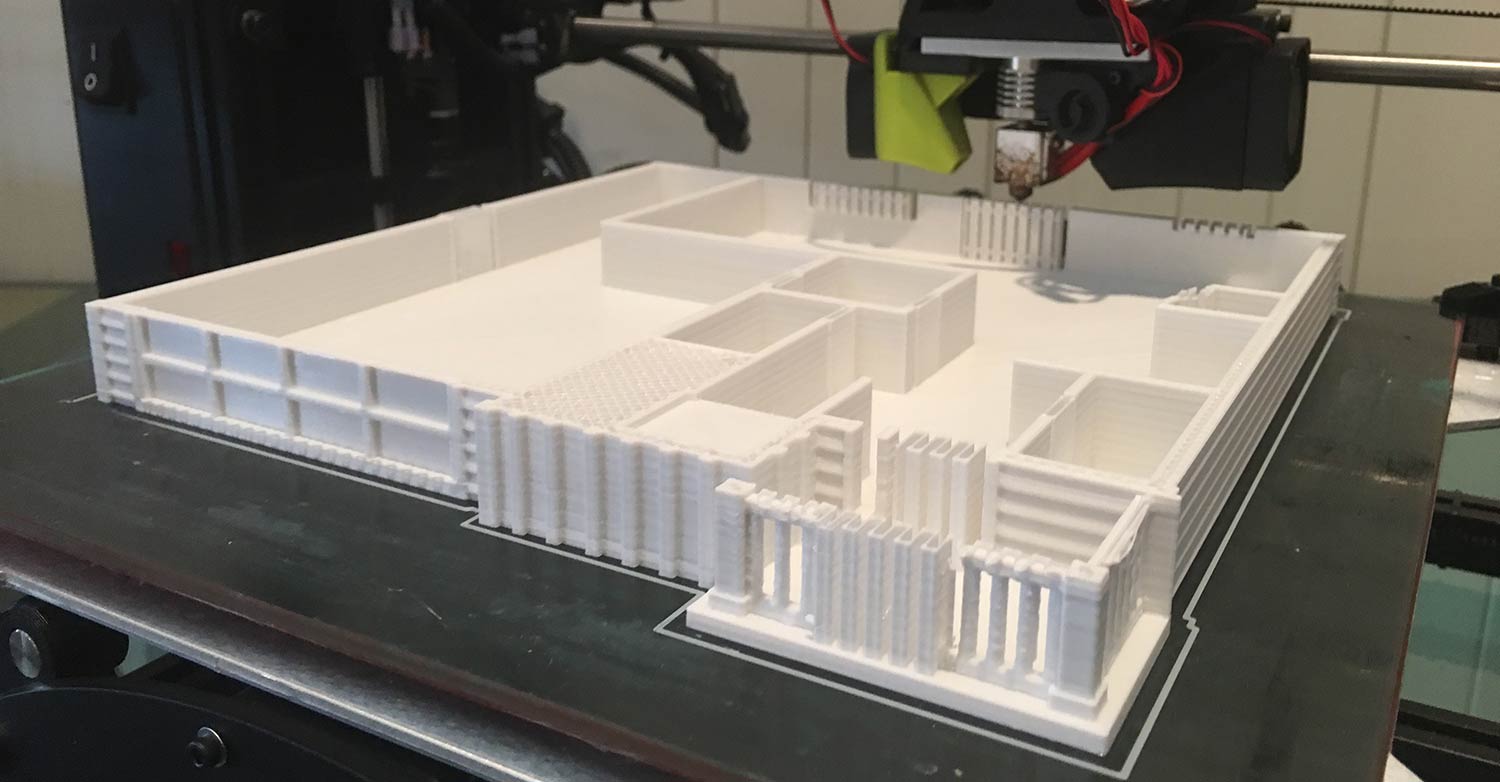
DESKTOP FDM/FFF 3D PRINTING IN-HOUSE
OUTSOURCE 3D PRINTING
Service providers like Shapeways, Sculpteo, 3D Hubs, Ponko, etc., give you a lot to choose regarding technologies and materials. They will do the whole 3D printing and post-processing work for you, leaving the tasks of designing, uploading your files and paying for the print, in your hands. If you are not looking to develop prototypes all the time, or even not for all of your projects, this would be the way to go. You can always get professional 3D printed results straight to your mail at a competitive price. As we said earlier, the 3D printing price is calculated per cubic volume of material needed.
3D PRINTING SERVICE PROVIDERS
CONCLUSION
The true investment in creating 3D printed architectural scale models is in the design. Getting the files ready and optimizing them is the key to successfully unitizing the technology. From there, whether you decide to outsource the printing process, or to do it in-house, the price per model and the time invested will be significantly reduced compared to the old ways of model making. It’s entirely up to you when you are going to dive in and improve communication with clients as well as your process of work within your team.
FIND OUT HOW ARCHITECTS, BUILDERS, AND REALTORS ARE USING 3d PRINTING:
What’re your thoughts on the Creating 3D Printed Architectural Scale Models? Do you think it will become the new standard for the architectural presentation? Let us know in the comment section below!
 My 3D Concepts LLC
  My 3D Concepts LLC
The image at the heading of this page: did you print that, and if not; who did and what printer and software did they use to get such a smooth rendered surface?
consists of the book itself